
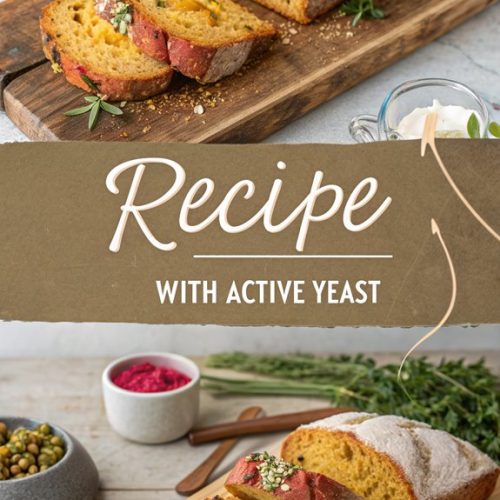
recipe with active yeast
Recipe With Active Yeast
Making bread can feel intimidating, yet the joy of a warm loaf fresh from the oven is undeniably rewarding. You might wonder how a few simple ingredients can transform into something so satisfying, and that’s where active yeast plays an essential role. It’s not just about following a recipe; it’s about understanding the process and history behind it. As you begin to explore the steps involved, you’ll uncover tips and tricks that elevate your baking experience. What’s the secret to achieving that perfect rise?
Why You’ll Love This Recipe
When you plunge into this recipe with active yeast, you’ll quickly discover why it’s a favorite among home bakers. First, it’s straightforward, making it ideal for beginners.
You’ll gather simple ingredients: flour, water, sugar, salt, and, of course, active yeast. As you mix them, you’ll notice how the yeast brings the dough to life, creating a wonderful texture.
This recipe offers flexibility; you can easily adjust flavors with herbs or spices. Plus, the aroma that fills your kitchen while baking is unbeatable.
Watching the dough rise is exciting, and the end result—a warm, homemade loaf—is incredibly satisfying. With each step, you’re not just baking; you’re creating something delicious and rewarding.
You’ll love the process as much as the outcome!
History
The history of baking with active yeast dates back thousands of years, illustrating humanity’s long-standing relationship with fermentation.
Ancient Egyptians were among the first to discover its power, using it to leaven bread around 1500 BC. They likely stumbled upon it when dough was left out, allowing wild yeast from the air to mix in.
As cultures spread, so did the knowledge of yeast. By the Middle Ages, bakers in Europe began cultivating specific strains, leading to more consistent results.
You might find it interesting that, in the 19th century, scientists isolated yeast cells, paving the way for commercial yeast production.
Today, active yeast remains a staple in kitchens worldwide, reflecting a rich tradition that connects us all through food.
Recipe
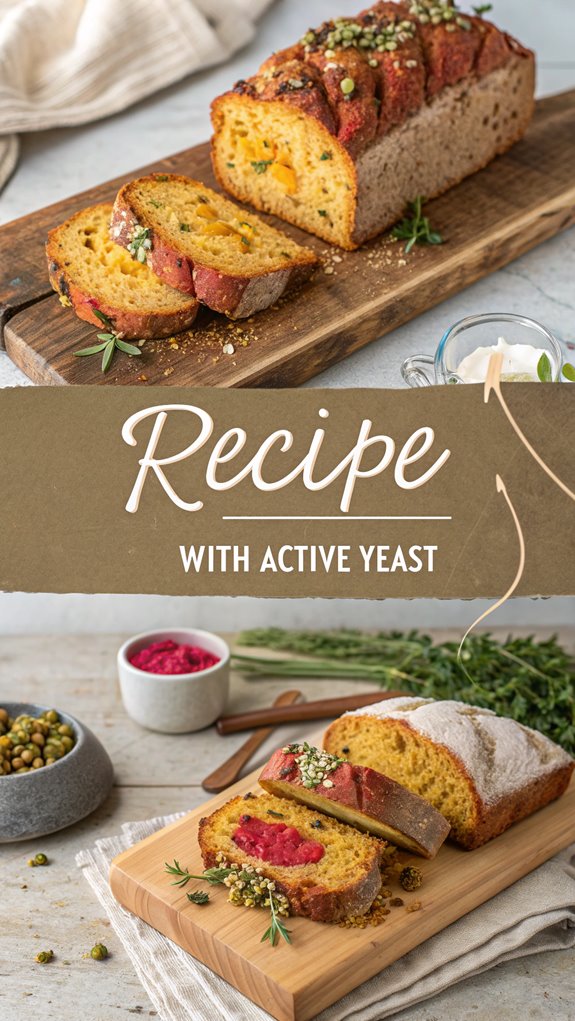
Recipe With Active Yeast****
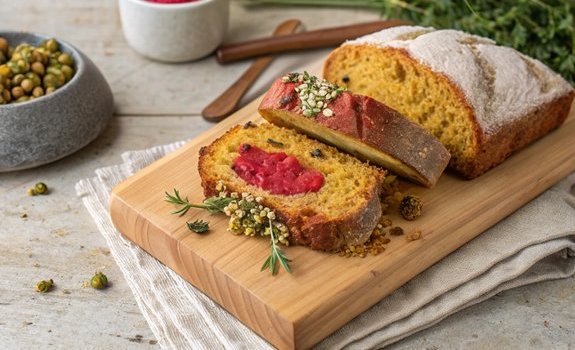
Baking with active yeast is a delightful journey that transforms simple ingredients into delicious bread or pastries. The magic of yeast lies in its ability to ferment, causing dough to rise and develop a wonderful texture and flavor.
Whether you’re a seasoned baker or a novice in the kitchen, this recipe will guide you through making a classic loaf of bread that will impress your family and friends.
To get started, confirm that your yeast is fresh and active. This recipe combines simple ingredients that are likely already in your pantry, making it an accessible option for anyone looking to bake homemade bread.
The process of kneading and letting the dough rise may seem intimidating, but with a little patience, you’ll be rewarded with a beautifully baked loaf that’s perfect for sandwiches, toast, or simply enjoying with butter.
Ingredients:
– 2 cups warm water (about 110°F)
– 2 tablespoons active dry yeast
– 1/4 cup sugar
– 1 tablespoon salt
– 1/4 cup vegetable oil
– 5 to 6 cups all-purpose flour
Cooking Instructions:
- In a large mixing bowl, combine the warm water and sugar. Sprinkle the active dry yeast over the water and let it sit for about 5-10 minutes until it becomes foamy. This indicates that the yeast is active and ready to use.
- Once the yeast is foamy, add the salt and vegetable oil to the mixture. Stir gently to combine.
- Gradually add in the flour, one cup at a time, mixing with a wooden spoon or your hands until the dough begins to come together. You may not need all the flour, so add it slowly until the dough is no longer sticky.
- Transfer the dough onto a floured surface and knead it for about 8-10 minutes, or until it’s smooth and elastic. If the dough is too sticky, sprinkle a little more flour as needed.
- Place the kneaded dough into a lightly greased bowl, cover it with a clean kitchen towel, and let it rise in a warm place for about 1 to 2 hours, or until it has doubled in size.
- Once the dough has risen, punch it down to release the air. Shape it into a loaf and place it in a greased loaf pan. Cover it again with a towel and let it rise for another 30-45 minutes.
- Preheat your oven to 375°F (190°C). Once the dough has risen, bake it in the preheated oven for about 25-30 minutes or until the top is golden brown and the loaf sounds hollow when tapped.
- Remove the bread from the oven and let it cool in the pan for a few minutes before transferring it to a wire rack to cool completely.
Extra Tips:
When baking with active yeast, confirm your water is at the right temperature; too hot can kill the yeast, while too cold won’t activate it.
Always allow your dough to rise in a warm, draft-free environment for the best results. If you want to add flavor to your bread, consider mixing in herbs, cheese, or seeds during the kneading process.
Enjoy your homemade bread fresh, or store it in an airtight container for later use!
Final Thoughts
Baking your own bread can be a rewarding experience that not only fills your home with a delightful aroma but also allows you to enjoy the satisfaction of creating something from scratch.
By using active yeast, you introduce life into your dough, making it rise and develop texture. Remember to measure your ingredients accurately and follow the recipe closely for the best results.
Don’t rush the process; give your dough time to rise and develop flavor. Once you’ve mastered the basics, you can experiment with different flavors and ingredients.
Share your fresh bread with friends and family, and enjoy the compliments that come your way. With practice, you’ll become more confident in your baking skills, creating delicious bread every time.
FAQ
When you’re new to using active yeast, it’s natural to have questions about the process. One common question is, “How do I know if my yeast is still good?”
To check, dissolve a teaspoon of sugar in warm water, add your yeast, and wait for about 10 minutes. If it bubbles and froths, it’s active.
Another question might be, “Can I substitute dry yeast for active yeast?” Yes, but remember that dry yeast is more concentrated, so you’ll need less.
Also, some wonder about rising time; it usually takes 1 to 2 hours in a warm place.
Finally, don’t forget to store your yeast in a cool, dry place to keep it fresh for longer. Happy baking!
Recipe With Active Yeast
Ingredients
- Ingredients:
- - 2 cups warm water about 110°F
- - 2 tablespoons active dry yeast
- - 1/4 cup sugar
- - 1 tablespoon salt
- - 1/4 cup vegetable oil
- - 5 to 6 cups all-purpose flour
Instructions
- Cooking Instructions:
- In a large mixing bowl, combine the warm water and sugar. Sprinkle the active dry yeast over the water and let it sit for about 5-10 minutes until it becomes foamy. This indicates that the yeast is active and ready to use.
- Once the yeast is foamy, add the salt and vegetable oil to the mixture. Stir gently to combine.
- Gradually add in the flour, one cup at a time, mixing with a wooden spoon or your hands until the dough begins to come together. You may not need all the flour, so add it slowly until the dough is no longer sticky.
- Transfer the dough onto a floured surface and knead it for about 8-10 minutes, or until it's smooth and elastic. If the dough is too sticky, sprinkle a little more flour as needed.
- Place the kneaded dough into a lightly greased bowl, cover it with a clean kitchen towel, and let it rise in a warm place for about 1 to 2 hours, or until it has doubled in size.
- Once the dough has risen, punch it down to release the air. Shape it into a loaf and place it in a greased loaf pan. Cover it again with a towel and let it rise for another 30-45 minutes.
- Preheat your oven to 375°F (190°C). Once the dough has risen, bake it in the preheated oven for about 25-30 minutes or until the top is golden brown and the loaf sounds hollow when tapped.
- Remove the bread from the oven and let it cool in the pan for a few minutes before transferring it to a wire rack to cool completely.